How to Make Crispy Chili Garlic Oil at Home
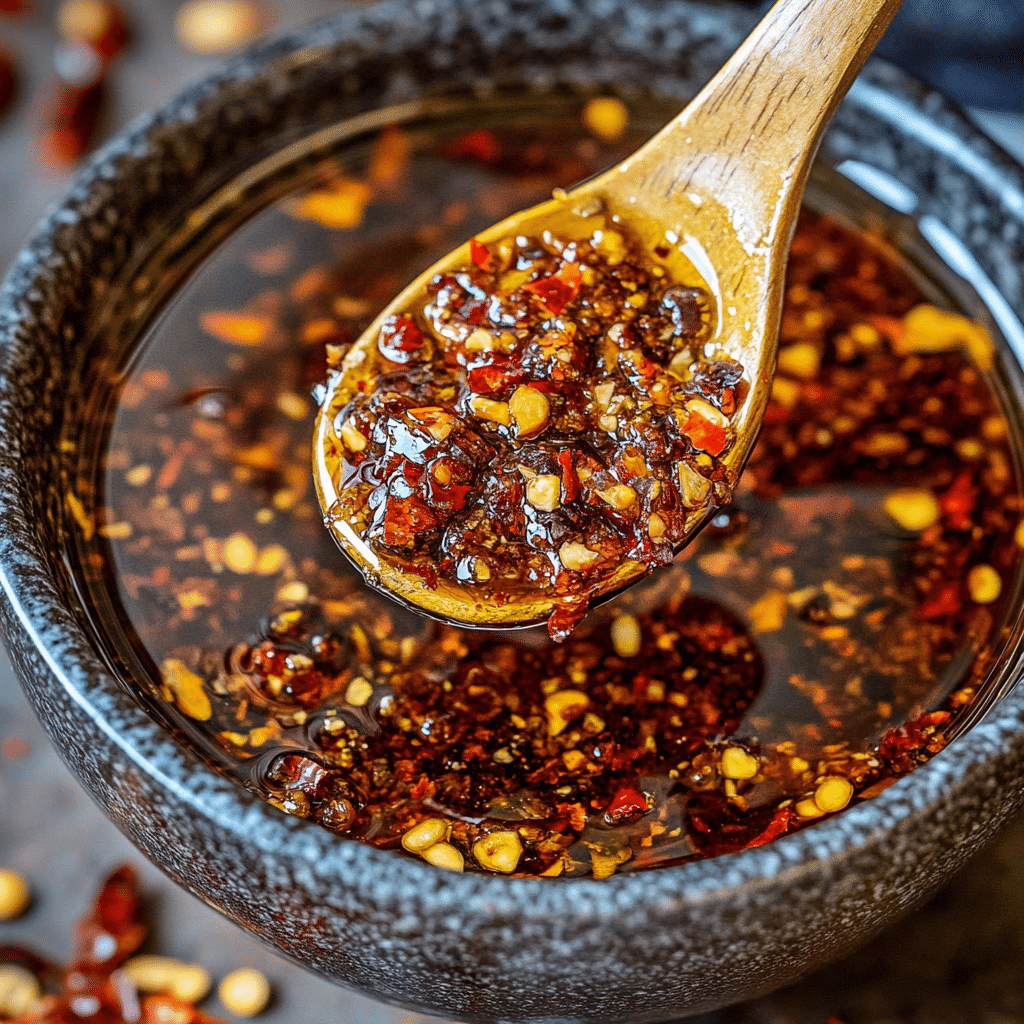
If you love bold, spicy flavors with a satisfying crunch, Crispy Chili Garlic Oil is your new kitchen essential. This homemade condiment infuses everyday meals with a vibrant, smoky heat and the irresistible aroma of toasted garlic and chili flakes. Easy to prepare and endlessly versatile, this recipe helps you bring the magic of your favorite Asian restaurants right into your own home, perfect for drizzling, dipping, or cooking.
Why You’ll Love This Recipe
- Deep Flavor: The slow-fried garlic and toasted chili create layers of rich, smoky spice you won’t find in store-bought versions.
- Crunchy Texture: The crispy bits add exciting texture that elevates any dish, from noodles to grilled meats.
- Simple Ingredients: Minimal pantry staples come together easily, making this recipe approachable for everyone.
- Customizable Heat: Adjust chili quantity to match your spice tolerance and taste preference.
- Long Shelf Life: Properly stored, this oil lasts for weeks, so you can enjoy it anytime.
Ingredients You’ll Need
The beauty of this recipe is in its simplicity — every ingredient plays a vital role to build the perfect balance of flavor, aroma, and texture in your Crispy Chili Garlic Oil.
- Dried Red Chili Flakes: The star spice, providing heat and color; choose high-quality flakes for the best taste.
- Garlic Cloves: Sliced thin for maximum crunch and infused flavor.
- Neutral Oil: Such as vegetable or canola oil, which lets the garlic and chili flavors shine without overpowering.
- Salt: Enhances all the flavors and helps preserve the oil.
- Optional: Sichuan Peppercorns: For a unique numbing sensation and additional depth.
Variations for Crispy Chili Garlic Oil
Don’t hesitate to tweak this recipe! It’s incredibly adaptable, so you can tailor it to your dietary needs or flavor cravings.
- Spicy Boost: Add fresh chopped hot peppers to intensify heat and freshness.
- Umami Upgrade: Mix in toasted sesame seeds or a splash of soy sauce for richer complexity.
- Garlic Lover’s Version: Double the garlic for an even more pungent garlic punch.
- Vegan Friendly: Stick to plant-based oil and skip any animal-derived ingredients (if you add extras, like dried shrimp).
- Smokier Flavor: Use smoked paprika along with chili flakes to introduce smoky undertones.

How to Make Crispy Chili Garlic Oil
Step 1: Prepare the Ingredients
Thinly slice 6 to 8 garlic cloves and measure out 3 to 4 tablespoons of dried red chili flakes. If using, lightly crush 1 teaspoon of Sichuan peppercorns. Ensure everything is ready to go before heating the oil so the process flows smoothly.
Step 2: Heat the Oil Gently
Pour 1 cup of neutral oil into a small saucepan. Warm the oil over low heat, taking care not to let it become too hot too fast. The goal is to slowly infuse the garlic and chili flavors without burning.
Step 3: Fry the Garlic Until Golden and Crispy
Add the sliced garlic and optional Sichuan peppercorns into the warm oil. Stir gently and keep the heat low-medium. Watch closely as the garlic turns golden brown and crispy. This step is key for the oil’s rich flavor and crunchy texture.
Step 4: Mix in the Chili Flakes
Remove the oil from heat and quickly stir in the chili flakes and salt. The residual heat will toast the chili flakes gently, releasing their aroma without scorching them. Let the mixture cool to room temperature.
Step 5: Store and Serve
Transfer the Crispy Chili Garlic Oil into a clean jar. The crispy garlic bits settle into the oil, creating mouthwatering pockets of flavor. Store it in an airtight container in the refrigerator for up to 3 weeks.
Pro Tips for Making Crispy Chili Garlic Oil
- Low and Slow Cooking: Keeping the oil on low heat prevents the garlic from burning and turning bitter.
- Slice Garlic Evenly: Uniform slices ensure consistent frying and perfect texture.
- Use Fresh Ingredients: Fresh garlic and high-quality chili flakes produce the best result.
- Don’t Overcrowd the Pan: Fry garlic in batches if needed to avoid lowering the oil temperature.
- Let It Cool Completely: This helps the flavors meld and enhances the crispy crunch.
How to Serve Crispy Chili Garlic Oil
Garnishes
Use Crispy Chili Garlic Oil as a vibrant garnish on steamed vegetables, creamy tofu, or freshly made dumplings—it adds color, crunch, and a spicy kick that instantly wakes up your plate.
Side Dishes
Drizzle over simple rice dishes, stir-fried noodles, or roasted potatoes for an exciting twist on everyday sides. Its bold flavor pairs especially well with bland or mild dishes, transforming them into crave-worthy meals.
Creative Ways to Present
Try serving it as a dipping sauce for dumplings, spring rolls, or grilled meats. You can also swirl a spoonful into soups or mix into salad dressings for an unexpected burst of spice and texture.
Make Ahead and Storage
Storing Leftovers
Store your Crispy Chili Garlic Oil in a glass jar with a tight lid in the refrigerator. The oil will thicken slightly but remain easy to scoop, and the flavors will deepen over time.
Freezing
While freezing is possible, it’s best to avoid it as the texture of the crispy garlic might change. For longer preservation, keeping it refrigerated is ideal.
Reheating
If the oil solidifies in the fridge, warm it gently in a microwave or warm water bath to return it to liquid form. Avoid overheating to keep the crispy pieces crunchy and flavorful.
FAQs
What type of oil is best for Crispy Chili Garlic Oil?
Neutral oils with high smoke points like vegetable, canola, or peanut oil work best as they let the garlic and chili flavors shine without competing.
Can I use fresh chili instead of dried chili flakes?
Fresh chili changes the texture and moisture content, so for crispiness, dried chili flakes are preferred, though you can add fresh chili for extra heat.
How spicy is Crispy Chili Garlic Oil?
The heat level depends on the chili flakes you use; you can control the spice by adjusting the amount to suit your preference.
Is this recipe vegan and gluten-free?
Yes, by using plant-based oil and ensuring no additional flavorings contain gluten or animal products, this recipe is safe for vegan and gluten-free diets.
How long can I keep Crispy Chili Garlic Oil?
Stored in the refrigerator within an airtight jar, it stays fresh and flavorful for up to 3 weeks.
Final Thoughts
Making your own Crispy Chili Garlic Oil at home is not just easy but also incredibly rewarding. This versatile recipe adds warmth, spice, and crunch to so many dishes, transforming simple meals into unforgettable culinary experiences. Give it a try today—you’ll wonder how you ever lived without it!
Related Posts
PrintCrispy Chili Garlic Oil
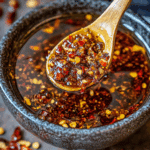
Crispy Chili Garlic Oil is a bold and spicy homemade condiment featuring slow-fried garlic and toasted chili flakes in neutral oil, delivering layers of smoky heat and crunchy texture. Perfect for drizzling, dipping, or cooking, it adds vibrant flavor and aroma to any dish and lasts for weeks in the refrigerator.
- Prep Time: 10 minutes
- Cook Time: 15 minutes
- Total Time: 25 minutes
- Yield: About 1 cup 1x
- Category: Appetizers
- Method: Stovetop frying
- Cuisine: Asian
- Diet: Gluten Free, Vegan
Ingredients
Essential Ingredients
- 6 to 8 garlic cloves, thinly sliced
- 3 to 4 tablespoons dried red chili flakes
- 1 cup neutral oil (vegetable or canola oil)
- Salt, to taste
Optional Ingredients
- 1 teaspoon Sichuan peppercorns, lightly crushed
Instructions
- Prepare the Ingredients: Thinly slice the garlic cloves and measure out the dried red chili flakes. If using, lightly crush the Sichuan peppercorns. Have everything ready before heating the oil for a smooth cooking process.
- Heat the Oil Gently: Pour the neutral oil into a small saucepan and warm it over low heat. Heat slowly to infuse flavors without burning.
- Fry the Garlic Until Golden and Crispy: Add sliced garlic and optional Sichuan peppercorns to the warm oil. Stir gently, maintaining low-medium heat, until the garlic turns golden brown and crispy, creating depth of flavor and texture.
- Mix in the Chili Flakes: Remove the oil from heat and quickly stir in the chili flakes and salt. The residual heat will gently toast the flakes, releasing aroma without burning. Let the mixture cool to room temperature.
- Store and Serve: Transfer the oil and crispy bits to a clean jar. Store refrigerated in an airtight container for up to 3 weeks. Use as a garnish, drizzle, or dip.
Notes
- Cook the oil on low heat to avoid burning the garlic, which causes bitterness.
- Slice garlic evenly to ensure consistent frying and texture.
- Use fresh garlic and high-quality dried chili flakes for best flavor.
- Fry garlic in batches if necessary to maintain oil temperature.
- Allow the oil to cool completely to enhance flavor melding and crunchy texture.
Nutrition
- Serving Size: 1 tablespoon
- Calories: 120
- Sugar: 0g
- Sodium: 100mg
- Fat: 14g
- Saturated Fat: 2g
- Unsaturated Fat: 12g
- Trans Fat: 0g
- Carbohydrates: 1g
- Fiber: 0.5g
- Protein: 0.3g
- Cholesterol: 0mg
Keywords: chili oil, garlic oil, spicy condiment, crispy chili oil, Asian condiment, homemade chili oil