How to Make Homemade Pita Bread Easily

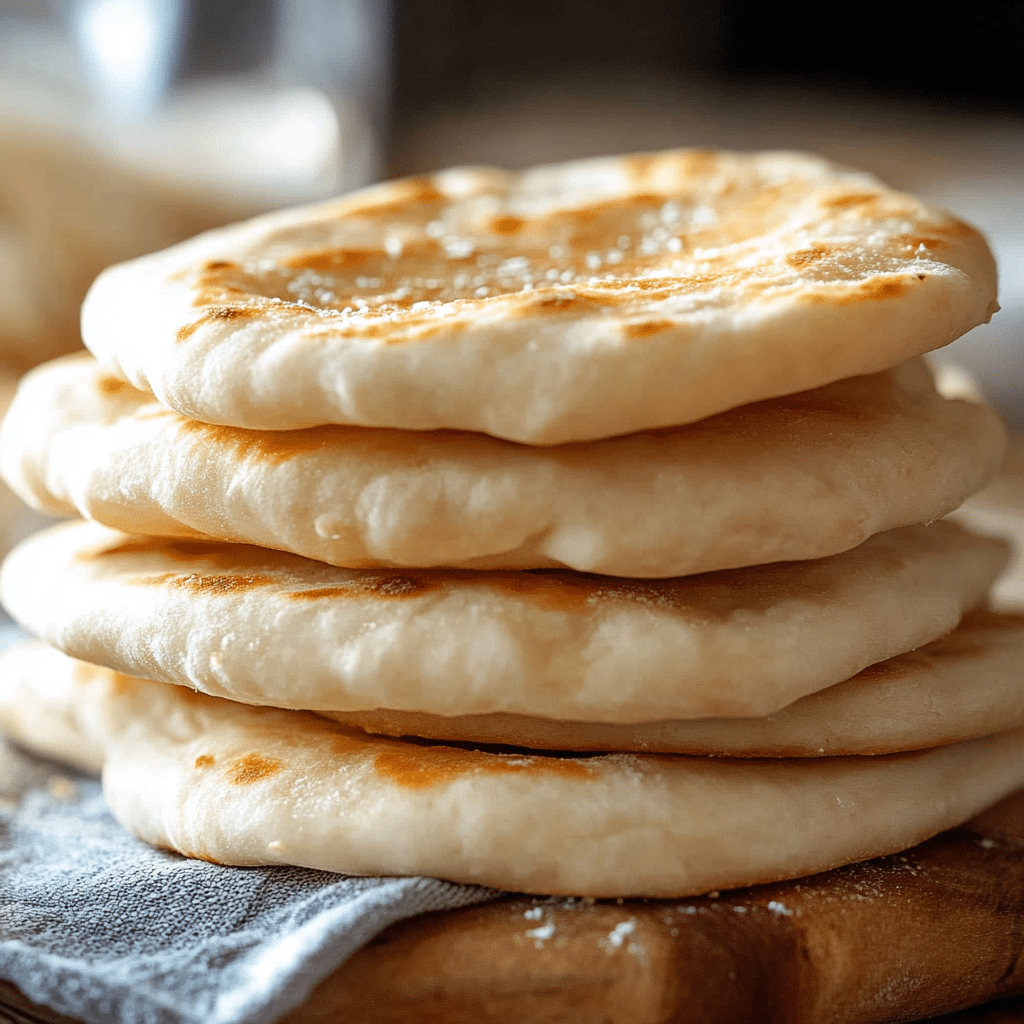
If you’ve ever enjoyed a warm, fluffy pocket of bread to scoop up your favorite dips or build a sandwich, then you’re going to love learning how to make Homemade Pita Bread. This simple recipe brings soft, pillowy goodness right to your kitchen, with just a few basic ingredients and easy steps anyone can master. Whether you’re a beginner or a seasoned baker, you’ll find making pita bread at home satisfying and delicious, perfect for sandwiches, wraps, or dipping into hummus.
Why You’ll Love This Recipe
- Simple ingredients: Uses pantry staples that are easy to find and budget-friendly.
- Quick preparation: Ready in under two hours, including rising time.
- Soft and fluffy texture: Perfect for sandwich pockets and soft enough for dipping.
- Versatile use: Ideal for everything from Mediterranean meals to casual snacks.
- Customizable: Easily adapted for different dietary preferences or flavors.
Ingredients You’ll Need
Creating amazing homemade pita bread relies on a handful of simple, wholesome ingredients. Each plays a key role in developing that characteristic taste, texture, and golden color that makes pita bread so irresistible.
- All-purpose flour: The base ingredient providing structure and chewiness.
- Warm water: Activates the yeast and helps create the soft dough.
- Active dry yeast: Essential for the dough to rise and create the hollow pocket.
- Olive oil: Adds moisture and richness to the bread.
- Salt: Enhances the flavor and balances the yeast’s fermentation.
- Sugar: Feeds the yeast to help it work its magic during rising.
Variations for Homemade Pita Bread
Feel free to customize your homemade pita bread to better match your tastes or dietary needs. This recipe is incredibly forgiving and can handle additions or substitutions without fuss.
- Whole wheat option: Substitute half or all the flour with whole wheat for a nuttier flavor and extra fiber.
- Herb infused: Add chopped rosemary, thyme, or oregano to the dough for a fragrant twist.
- Garlic pita: Mix garlic powder or roasted garlic into the dough for a savory kick.
- Gluten-free: Use a gluten-free flour blend designed for bread-making.
- Spiced version: Sprinkle cinnamon or smoked paprika on top before baking for a unique flavor profile.

How to Make Homemade Pita Bread
Step 1: Activate the yeast
Combine warm water and sugar in a bowl, then sprinkle the active dry yeast on top. Let it sit for 5-10 minutes until foamy, indicating the yeast is alive and ready.
Step 2: Mix the dough
In a large mixing bowl, combine the flour and salt. Pour in the yeast mixture and olive oil, then stir until a sticky dough forms.
Step 3: Knead the dough
Turn the dough onto a floured surface and knead for about 8-10 minutes until smooth and elastic, adding a bit more flour if the dough is too sticky.
Step 4: First rise
Place the kneaded dough in a lightly oiled bowl, cover with a damp cloth or plastic wrap, and let it rise in a warm spot for about 1 hour or until it doubles in size.
Step 5: Shape the pita rounds
Punch down the dough and divide it into equal portions. Roll each piece into a ball and then flatten into 1/4-inch thick rounds with a rolling pin.
Step 6: Second rise
Let the flattened rounds rest for 20 minutes, covered with a clean towel, to puff slightly before baking.
Step 7: Bake the pita bread
Preheat your oven to the highest temperature (around 475°F or 245°C) with a baking stone or inverted baking sheet inside. Place the pita rounds on the hot surface and bake for 2-3 minutes until they puff up and develop light golden spots.
Step 8: Cool and serve
Remove the baked pita from the oven and place them in a clean towel to keep soft while cooling. Serve warm or at room temperature.
Pro Tips for Making Homemade Pita Bread
- Warm liquid: Ensure water is warm, not hot, for activating yeast without killing it.
- Kneading matters: Knead thoroughly to develop gluten for that soft, chewy texture.
- Use a hot oven: High heat is crucial for creating steam that puffs up the bread to form pockets.
- Rest the dough: Allow adequate time for both rises to maximize fluffiness and flavor.
- Don’t over-bake: Watch carefully and remove as soon as pitas puff and brown slightly.
How to Serve Homemade Pita Bread
Garnishes
Top your warm pita with a drizzle of olive oil, a sprinkle of za’atar, sesame seeds, or freshly chopped herbs to enhance flavor and presentation.
Side Dishes
Serve alongside Mediterranean staples like hummus, baba ganoush, tzatziki, or grilled vegetables for a complete and satisfying meal.
Creative Ways to Present
Use the pita pockets for sandwiches stuffed with falafel, grilled chicken, or roasted veggies, or slice them into chips for dipping at parties and gatherings.
Make Ahead and Storage
Storing Leftovers
Keep leftover pita bread in an airtight container or resealable bag at room temperature for up to 2 days to maintain softness.
Freezing
Freeze pita breads stacked with parchment paper in between to prevent sticking, storing them for up to 3 months.
Reheating
Reheat pita in a warm skillet, toaster oven, or wrapped in foil inside a regular oven to revive softness and warmth before serving.
FAQs
Can I use whole wheat flour for homemade pita bread?
Absolutely! You can substitute part or all of the all-purpose flour with whole wheat, though the texture will be slightly denser and more hearty.
Why didn’t my pita bread puff up?
If your pita failed to puff, it might be due to oven temperature being too low, dough not resting enough, or the dough being rolled too thin or thick.
How long can I keep homemade pita bread?
When stored properly at room temperature in an airtight container, pita bread stays fresh for about 2 days, or longer if refrigerated or frozen.
Can I make pita bread without yeast?
Traditional pita uses yeast for the pocket to form, but you can experiment with baking powder for a quicker, though slightly different, flatbread.
Is homemade pita bread healthier than store-bought?
Making pita bread at home lets you control ingredients, avoid preservatives, and customize for better nutrition, making it a healthier option.
Final Thoughts
Making Homemade Pita Bread is not only fun but deeply rewarding. There’s something special about pulling warm, fluffy pockets right from your own oven that makes every meal more delightful. Give this easy recipe a try—you’ll soon have a versatile bread staple to impress family and friends or just to enjoy your own way. Trust me, once you make it homemade, it’s hard to go back!
Related Posts
- Why Honey Sriracha Salmon Rice Bowls Are a Must-Try
- Easy Lemon Garlic Butter Salmon Recipe Ideas
- Easy Shrimp & Avocado Bowls with Mango Salsa
Homemade Pita Bread
Learn how to make soft, fluffy homemade pita bread with simple pantry ingredients. This easy recipe yields warm, pillowy pockets perfect for sandwiches, wraps, or dipping, ready in under two hours with flexibility for dietary preferences and flavor variations.
- Prep Time: 20 minutes
- Cook Time: 3 minutes per batch
- Total Time: 1 hour 35 minutes
- Yield: 8 pita breads 1x
- Category: Appetizers
- Method: Baking
- Cuisine: Mediterranean
- Diet: Gluten Free
Ingredients
Main Ingredients
- 3 cups all-purpose flour (or gluten-free flour blend for gluten-free option)
- 1 cup warm water (about 110°F / 43°C)
- 2 teaspoons active dry yeast
- 2 tablespoons olive oil
- 1 teaspoon salt
- 1 teaspoon sugar
Instructions
- Activate the yeast: Combine warm water and sugar in a bowl, then sprinkle the active dry yeast on top. Let it sit for 5-10 minutes until foamy, indicating the yeast is alive and ready.
- Mix the dough: In a large mixing bowl, combine the flour and salt. Pour in the yeast mixture and olive oil, then stir until a sticky dough forms.
- Knead the dough: Turn the dough onto a floured surface and knead for about 8-10 minutes until smooth and elastic, adding a bit more flour if the dough is too sticky.
- First rise: Place the kneaded dough in a lightly oiled bowl, cover with a damp cloth or plastic wrap, and let it rise in a warm spot for about 1 hour or until it doubles in size.
- Shape the pita rounds: Punch down the dough and divide it into equal portions. Roll each piece into a ball and then flatten into 1/4-inch thick rounds with a rolling pin.
- Second rise: Let the flattened rounds rest for 20 minutes, covered with a clean towel, to puff slightly before baking.
- Bake the pita bread: Preheat your oven to the highest temperature (around 475°F or 245°C) with a baking stone or inverted baking sheet inside. Place the pita rounds on the hot surface and bake for 2-3 minutes until they puff up and develop light golden spots.
- Cool and serve: Remove the baked pita from the oven and place them in a clean towel to keep soft while cooling. Serve warm or at room temperature.
Notes
- Ensure water is warm, not hot, to activate yeast without killing it.
- Knead thoroughly to develop gluten for a soft, chewy texture.
- Use a hot oven to create steam that puffs up the bread and forms pockets.
- Allow adequate time for both rises to maximize fluffiness and flavor.
- Watch carefully while baking and remove as soon as pitas puff and brown slightly.
Nutrition
- Serving Size: 1 pita bread
- Calories: 150
- Sugar: 1 g
- Sodium: 220 mg
- Fat: 3 g
- Saturated Fat: 0.5 g
- Unsaturated Fat: 2.5 g
- Trans Fat: 0 g
- Carbohydrates: 28 g
- Fiber: 1 g
- Protein: 5 g
- Cholesterol: 0 mg
Keywords: pita bread, homemade pita, Mediterranean bread, soft flatbread, pita pockets, baking bread, gluten free bread


