Why Cheesy Garlic Breadsticks Are a Must-Try Snack
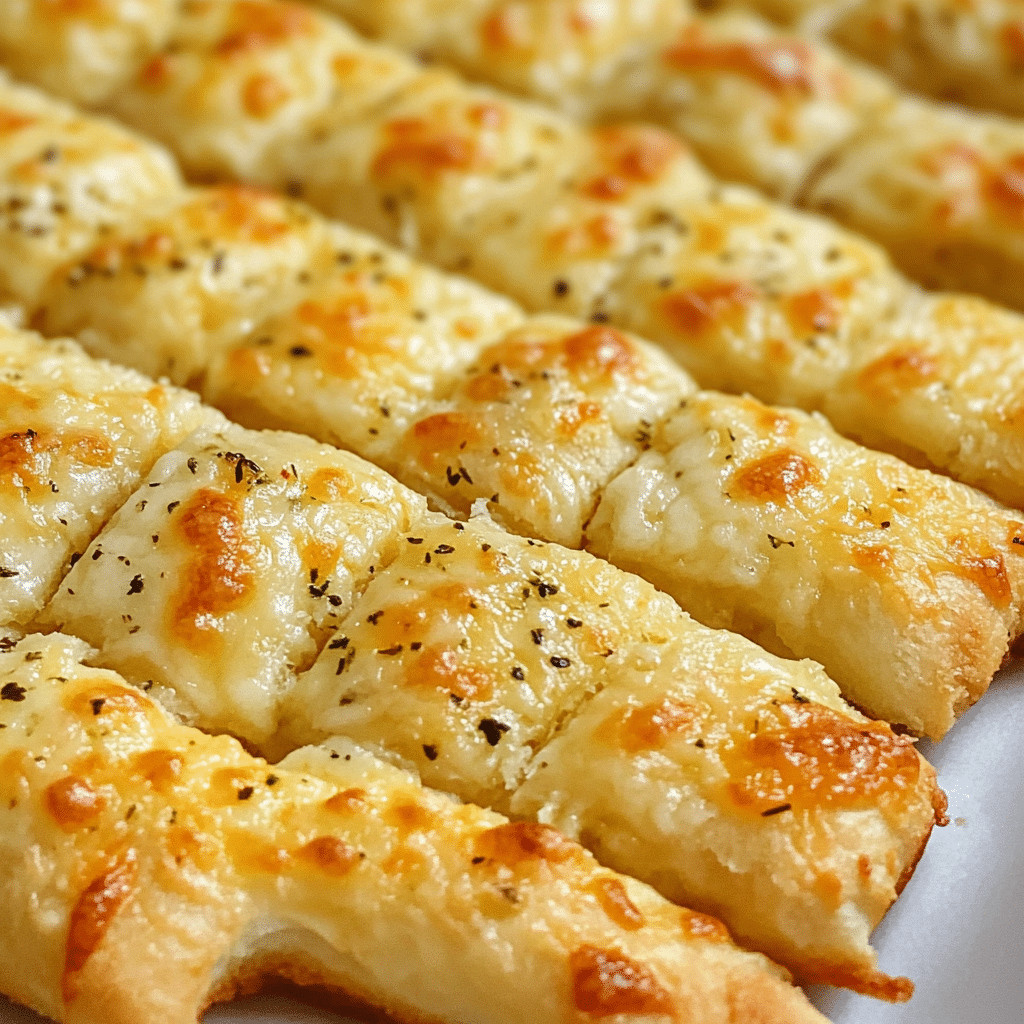
If you’ve ever dreamed of a snack that’s soft, warm, bursting with gooey cheese, and laced with rich garlic flavor, then Cheesy Garlic Breadsticks are exactly what you need in your life. These irresistible bites combine the perfect balance of tender bread, melted cheese, and aromatic garlic, making them a crowd-pleaser for any occasion. Whether you’re craving a quick snack or an appetizer to impress your guests, Cheesy Garlic Breadsticks deliver that comforting, savory goodness every single time.
Why You’ll Love This Recipe
- Ultimate comfort food: Soft, cheesy breadsticks with garlic flavor evoke cozy, satisfying vibes that everyone adores.
- Quick and easy to make: With simple ingredients and straightforward steps, this recipe fits perfectly into busy days or last-minute cravings.
- Versatile snack or appetizer: Serve them solo, with dips, or alongside meals to elevate any menu effortlessly.
- Perfect crowd-pleaser: Great for parties, family dinners, or casual get-togethers where sharing delicious food is key.
- Customizable flavors: You can tweak herbs, cheese types, and toppings to suit your own taste preferences.
Ingredients You’ll Need
This recipe shines because it sticks to easy, accessible ingredients that deliver big flavor and texture. Each component plays a special role—from the softness of the dough to the rich cheeses and fragrant garlic butter that bring everything together.
- Pizza dough: Use store-bought for convenience, or homemade for a personal touch and extra freshness.
- Garlic cloves: Freshly minced garlic gives a sharp, vibrant kick that dried garlic can’t match.
- Butter: Melted for brushing on top, it adds a luscious richness and helps carry the garlic flavors.
- Mozzarella cheese: The gooey star ingredient that melts to perfection and gives that classic cheesy pull.
- Parmesan cheese: Adds a sharp, nutty contrast and extra depth to the cheesy topping.
- Fresh parsley: A sprinkle of chopped parsley brightens the flavor and adds a pop of color for presentation.
- Salt and pepper: Essential for seasoning and balancing the garlic and cheese notes just right.
Variations for Cheesy Garlic Breadsticks
Want to make these Cheesy Garlic Breadsticks uniquely yours? The recipe easily adapts so you can switch up flavors or boost nutrition, making it ideal for different occasions or dietary needs.
- Herbed delight: Add dried oregano, basil, or rosemary to the garlic butter for an herby twist.
- Spicy kick: Sprinkle red pepper flakes or add a dash of cayenne to the butter for some heat.
- Cheese swap: Substitute mozzarella or parmesan with asiago, cheddar, or fontina for diverse cheesy profiles.
- Gluten-free option: Use gluten-free pizza dough to accommodate dietary restrictions without losing flavor.
- Vegan version: Use plant-based cheese and vegan butter to create a dairy-free treat everyone will love.

How to Make Cheesy Garlic Breadsticks
Step 1: Prepare the dough
Start by rolling out your pizza dough on a floured surface into a rectangular shape about 1/2 inch thick, making sure it’s even to ensure consistent baking.
Step 2: Make the garlic butter
Melt butter and mix in finely minced garlic, salt, and pepper. This mixture will coat the breadsticks with rich flavor and a glossy finish once baked.
Step 3: Brush the dough
Generously brush the garlic butter over the rolled-out dough, ensuring every corner is covered to maximize that irresistible taste.
Step 4: Add cheese
Sprinkle a blend of shredded mozzarella and parmesan evenly over the dough, creating a delicious cheesy layer that melts beautifully.
Step 5: Cut and bake
Slice the dough into breadstick-sized strips, place them on a baking sheet lined with parchment, and bake in a preheated oven until golden and bubbly, usually about 12-15 minutes.
Step 6: Garnish and serve
Once out of the oven, brush lightly with more garlic butter if desired and sprinkle fresh parsley on top before serving warm and fresh.
Pro Tips for Making Cheesy Garlic Breadsticks
- Use room temperature dough: It rolls out easier and creates a softer texture after baking.
- Don’t skimp on garlic: Fresh garlic boosts aroma and flavor more than powders or pre-minced options.
- Shred your own cheese: Pre-shredded cheese often has anti-caking agents that affect melting—fresh shredded cheese creates better meltiness.
- Watch your bake time: Overbaking dries out the breadsticks, so keep an eye for a golden crust with bubbling cheese.
- Serve warm: They taste best fresh out of the oven, so plan your timing accordingly.
How to Serve Cheesy Garlic Breadsticks
Garnishes
A light sprinkle of fresh parsley or chives adds color and a mild herbal note that contrasts nicely with the rich cheese. You can also drizzle a touch of olive oil or sprinkle flaky sea salt for extra texture.
Side Dishes
Pair these breadsticks with classic tomato marinara for dipping, creamy ranch, or a spicy arrabbiata sauce to complement the cheesy garlic flavor. They also work beautifully alongside salads, soups, or pasta dishes as a comforting carb companion.
Creative Ways to Present
Arrange them in a circular pattern on a platter with dipping sauces in the center for a beautiful appetizer display. For a party, try stacking breadsticks in a tall jar or wrapping a bundle with a ribbon for a rustic snack surprise.
Make Ahead and Storage
Storing Leftovers
Keep leftover breadsticks in an airtight container at room temperature for up to 2 days to retain freshness and softness.
Freezing
Wrap cooled breadsticks tightly in plastic wrap and place in a freezer bag to store for up to 3 months. Thaw overnight in the fridge before reheating for best texture.
Reheating
Reheat breadsticks in a preheated oven at 350°F for about 5-7 minutes until warmed through and the cheese is melty again; avoid microwaving to prevent sogginess.
FAQs
Can I use pre-made garlic butter instead of making my own?
Yes, pre-made garlic butter can be used, but fresh minced garlic mixed into melted butter typically provides a stronger, fresher flavor that elevates the breadsticks.
What type of cheese works best for Cheesy Garlic Breadsticks?
Mozzarella is the classic choice because of its meltability, but combining it with parmesan or other cheeses like asiago can add extra flavor and texture.
Are Cheesy Garlic Breadsticks suitable for freezing?
Absolutely! They freeze well if wrapped securely and can be reheated easily without losing their delicious taste or texture.
Can I make Cheesy Garlic Breadsticks gluten-free?
Yes, using gluten-free pizza dough makes this recipe friendly for gluten-sensitive eaters and still delivers great taste and texture.
How spicy can I make these breadsticks?
Adding red pepper flakes or a dash of cayenne to the garlic butter is an easy way to introduce heat, allowing for a customizable spicy variation.
Final Thoughts
Cheesy Garlic Breadsticks are one of those simple pleasures that never go out of style. Their soft bread, ooey-gooey cheese, and irresistible garlic flavor make them a perfect go-to recipe whether you’re serving friends, feeding family, or just treating yourself. Dive in and enjoy every warm, cheesy bite—you’ll wonder why you didn’t make them sooner!
PrintCheesy Garlic Breadsticks

Cheesy Garlic Breadsticks are soft, warm, and bursting with gooey mozzarella and parmesan cheese, combined with rich garlic butter and fresh herbs. Perfect as a comforting snack or appetizer, they are quick to make using simple ingredients and customizable for various dietary needs, including gluten-free and vegan options.
- Prep Time: 10 minutes
- Cook Time: 15 minutes
- Total Time: 25 minutes
- Yield: 12 breadsticks 1x
- Category: Appetizers
- Method: Baking
- Cuisine: American
- Diet: Gluten Free (if using gluten-free dough)
Ingredients
Dough
- 1 batch pizza dough (store-bought or homemade)
Garlic Butter
- 4 tablespoons butter, melted
- 3 garlic cloves, freshly minced
- Salt, to taste
- Black pepper, to taste
Cheeses
- 1 cup shredded mozzarella cheese
- 1/2 cup grated parmesan cheese
Garnish
- 2 tablespoons fresh parsley, chopped
Instructions
- Prepare the dough: Roll out your pizza dough on a floured surface into a rectangular shape about 1/2 inch thick, making sure it’s even to ensure consistent baking.
- Make the garlic butter: Melt the butter and mix in the finely minced garlic, salt, and pepper. This mixture will coat the breadsticks with rich flavor and a glossy finish once baked.
- Brush the dough: Generously brush the garlic butter over the rolled-out dough, ensuring every corner is covered to maximize that irresistible taste.
- Add cheese: Sprinkle a blend of shredded mozzarella and parmesan evenly over the dough, creating a delicious cheesy layer that melts beautifully.
- Cut and bake: Slice the dough into breadstick-sized strips, place them on a baking sheet lined with parchment paper, and bake in a preheated oven at 400°F (200°C) for about 12-15 minutes until golden and bubbly.
- Garnish and serve: Once out of the oven, optionally brush lightly with more garlic butter and sprinkle fresh parsley on top. Serve warm and fresh for the best flavor and texture.
Notes
- Use room temperature dough for easier rolling and softer texture.
- Use fresh minced garlic for the best aroma and flavor.
- Shred your own cheese to improve meltiness and texture.
- Watch the baking time closely to avoid drying out the breadsticks; look for golden crust and bubbling cheese.
- Serve breadsticks warm fresh from the oven to enjoy optimal flavor and gooey cheese.
Nutrition
- Serving Size: 1 breadstick
- Calories: 150
- Sugar: 0.5g
- Sodium: 220mg
- Fat: 9g
- Saturated Fat: 5g
- Unsaturated Fat: 3g
- Trans Fat: 0g
- Carbohydrates: 15g
- Fiber: 1g
- Protein: 6g
- Cholesterol: 25mg
Keywords: cheesy garlic breadsticks, garlic breadsticks, cheesy snack, appetizer, gluten-free breadsticks, party food, garlic butter breadsticks